


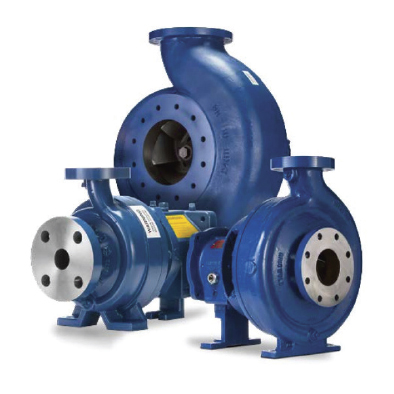
The Griswold® 811 ANSI Series is comprised of a versatile, reliable collection of centrifugal pumps. With over thirty models available in a wide range of sizes and capacities, Griswold 811 ANSI Series centrifugal pumps are heavy-duty, ASME B73.1 compliant, and purpose-built to fit any process-fluid application.
Maintaining these pumps is a simplified process thanks to their advanced engineering. Installing or replacing the seals is a particularly crucial part of basic maintenance to avoid fluid leaks, ruptures and other safety hazards.
Installing either a cartridge or component-type seal is a standard process depending on the pump size and style. To help make the installation process easier, we’ve created this quick and handy guide to installing both types of seals.
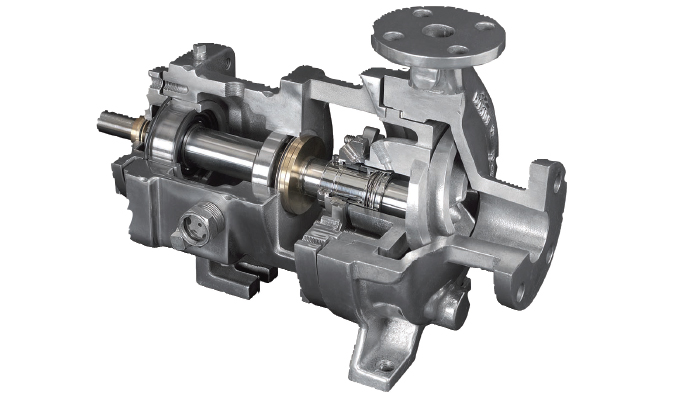
INSTALLING AES CARTRIDGE SEALS: STEP BY STEP
Using a workbench or similar flat workspace, screw in all the studs into the stuffing box. Next, install the seal onto the stuffing box, with the flush line inlet facing the power frame, then place two washers on each stud, and cap them off with a nut. Turn the stuffing box with the seal attached over and lube the back O-ring that seals on the sleeve.
Now slide the sleeve on the power frame shaft, and then mount the stuffing box and seal straight on the sleeve—make sure the flush line is facing towards the sight glass/power frame side. Then screw the nuts on the stuffing box studs. Lightly lube the threads on the shaft and the impeller, and place the O-ring on the impeller. Now that the O-ring is in place, spin the impeller on the threaded end of the shaft.
Once the impeller is tightened down, insert the case gasket into the case and slide the front case back on and tighten down the case bolts. Make sure the impeller adjustment bolts in the back are backed off so the case mates up to the impeller.
Congratulations—your AES cartridge seals are now installed.
ADJUSTING AND SETTING THE IMPELLER
Adjusting and setting the impeller for the 811 ANSI Series is relatively simple. First, run the impeller all the way forward to the starting point and set your dial indicator to zero. Now move the impeller to the desired setting.
Once you have the setting right, tighten up the seal. To accomplish this, torque down each bolt a little at a time to make sure the seal goes in straight and flat. Once the seal is in, run the set screws in to mate up to the shaft.
After the set screws are tightened, remove the safety clips. One additional tip: Be sure to save the clips for future use.
INSTALLING COMPONENT SEALS: STEP BY STEP
As with before, begin by using a workbench or similar flat workspace. Lube the capsulated the O-ring on the gland seal, and install the seal into the gland, relief side down (this is the seal point on the stuffing box). Once the seal is in the gland, wipe off any excess grease from the gland (and also your fingers!). Line up the gland with the studs on the stuffing box, slide it on, and tighten the bolts.
Next, make sure your calipers are nearby. Take the sleeve and seal and, using calipers, measure from the shaft side out to this seal for the style of pump you’re using. You’ll need to check your manual for specs.
Once you have your sleeve measurement, slide on the spring. Begin by lubing the seal itself and sliding it on the sleeve, then wipe off any excess grease. Next, place the stuffing box onto the power frame, then slide the seal into the stuffing box, moving the gland so it goes past the seal face.
Now, lube the impeller seal and press the O-ring onto it. Lube the shaft threads on the stuffing box, then slide the impeller on and spin it down. Once the impeller is on, tighten the gland bolts down so the gland is as straight as possible. To inspect your work, carefully make sure the impeller rotates freely with no binds.
GETTING THE MOST FROM YOUR PUMP
Keep these guidelines close by. With these steps, you’ll be able to install or replace seals quickly and seamlessly to get your pumps up and running with maximum efficiency.
GRISWOLD 811 ANSI SERIES PUMPS: UP CLOSE
The 811 ANSI Series is available in a wide range of sizes, capacities, and materials to fit virtually any process-fluid application. Griswold has your application covered—for abrasives, corrosive substances, and a wide range of capacities.
MAX FLOW RATE
7,000 gallons per minute
MAX HEAD
900 feet
MAX TEMPERATURE
500 degrees Fahrenheit
(260 degrees Celsius)
AVAILABLE MATERIALS
Ductile Iron
316 Stainless Steel
Alloy 20
CD4MCuN
FOR MORE INFORMATION
James Farley is Griswold product manager. Griswold is a product brand of PSG, a Dover company. PSG is comprised of several leading pump companies, including Abaque®, All-Flo™, Almatec®, Blackmer®, Ebsray®, em-tec®, Griswold®, Hydro™, Mouvex®, Neptune®, Quantex™, Quattroflow®, RedScrew™, and Wilden®. For more information, visit www.psgdover.com/griswold.
MODERN PUMPING TODAY, September 2022
Did you enjoy this article?
Subscribe to the FREE Digital Edition of Modern Pumping Today Magazine!